
A drip from the ceiling, a damp cabinet, or water running down an interior wall can turn a good stay in the Texas Hill Country into a stressful one fast. If you are asking, “why is RV vent leaking,” the answer is often not the vent itself. Water can enter around a roof vent, travel along the roof decking or wall structure, and show up several feet away from the actual opening.
The good news is that many RV vent leaks can be found and repaired before they become major roof or wall damage. The key is identifying what kind of vent you have, when the leak occurs, and whether you are dealing with rainwater, plumbing water, condensation, or a problem with an appliance exhaust system.
Why Is RV Vent Leaking During Rain?
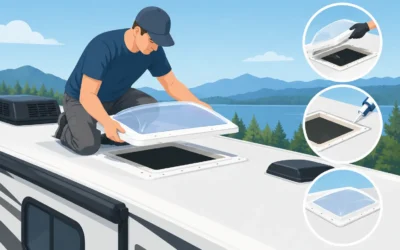
A roof vent is one of the most common leak points on an RV. Bathroom vents, kitchen vents, refrigerator roof vents, plumbing vent stacks, and skylights all require openings through the roof. Every opening depends on a sound vent cover, proper sealant, and secure mounting hardware to keep water outside.
Over time, Texas heat and UV exposure can dry, crack, or pull away roof sealant. Heavy rain, tree branches, road vibration, and temperature swings can loosen screws or damage the vent flange. Even a small gap can let water under the sealant and into the roof structure.
A rain-related leak may appear as a stain around the vent trim, a soft spot in the ceiling, or a drip that starts after a storm. Sometimes the ceiling looks dry while water is collecting inside the roof or wall. That is one reason a quick repair matters. Moisture trapped in an RV can lead to rotten wood, damaged insulation, mold, and delamination of exterior walls.
Cracked or Loose Vent Covers
The plastic lid on a standard roof vent takes a lot of sun and wind. It can become brittle, crack at the hinge, or break around the crank mechanism. A damaged cover may leak only when rain blows from a certain direction, which can make the issue seem intermittent.
Check the cover from outside only when the roof is dry and safe to walk on. Look for cracks, missing pieces, warped plastic, and a lid that does not close fully. From inside, make sure the crank closes the vent tightly and that the screen and interior garnish are not holding moisture.
Failed Sealant Around the Vent Flange
Sealant is meant to flex as the RV moves, but it does not last forever. Look for cracks, gaps, lifted edges, discoloration, or sealant that feels dry and separated from the roof material. Do not assume more sealant over the top is always the right repair. The roof surface must be clean, dry, and compatible with the sealant being used.
Different RV roofs require different products and repair methods. Applying the wrong material can create a larger issue or make a future professional repair more difficult. A technician can inspect the flange, mounting screws, roof membrane, and surrounding area to determine whether the vent needs resealing, replacement, or a repair to the roof beneath it.
Water Entering From a Nearby Roof Opening
Water follows the easiest path, not necessarily the closest one. A leaking air conditioner gasket, skylight, antenna, solar panel mount, roof seam, or refrigerator vent can send water toward a roof vent opening. If the stain is near a vent, the vent is a likely suspect, but it should not be blamed without checking the entire area.
This is especially true after a Hill Country downpour, when wind-driven rain can work into places that do not leak during a light shower. A proper inspection traces the water path rather than sealing the first suspect and hoping the problem is solved.
When the Leak Happens Without Rain
If your RV vent leaks on a clear day, rainwater is probably not the cause. Start by asking what was running when you noticed the moisture. Was the bathroom shower in use? Was the air conditioner running hard? Did you empty holding tanks, use the kitchen sink, or notice an odor near the refrigerator?
Those details help narrow the diagnosis quickly.
Plumbing Vent or Bathroom Leak
A plumbing vent pipe runs through the roof to allow your RV drain system to breathe properly. It normally carries air, not water. If water is appearing near that vent inside the RV, the issue may be a damaged roof seal, but it can also be a cracked drain pipe, loose fitting, or leak from a nearby shower or sink line.
A bathroom ceiling stain can be especially misleading. Water from a shower valve, skylight, vent, or plumbing connection may all appear in the same area. If the leak worsens when fixtures are used, stop using that fixture until it can be inspected. Continuing to run water can soak insulation and flooring surprisingly fast.
Air Conditioner Condensation
Your roof air conditioner should direct condensation outside. In hot, humid weather, especially when the unit has been running continuously, a blocked drain path, damaged gasket, or installation issue can allow water to enter the RV instead.
This moisture often appears near the air conditioner ceiling assembly, but it can travel toward a nearby vent or light fixture. Turn the AC off if water is dripping from the interior assembly or near electrical components. A wet ceiling around electrical wiring is not a wait-and-see repair.
Refrigerator or Furnace Vent Concerns
Refrigerator and furnace vents serve a different purpose than a bathroom roof vent. They help appliances exhaust heat and combustion byproducts safely. Water around these vents may be caused by an exterior cover, roof penetration, sidewall seal, or appliance compartment issue.
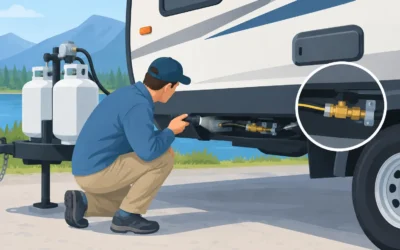
Do not block, tape over, or permanently seal an appliance vent to stop a leak. That can create a ventilation or combustion safety hazard. If you smell propane, notice soot, see corrosion, or suspect an LP gas appliance is involved, shut the appliance off if it is safe to do so and arrange for qualified service.
What You Can Check Safely Before Calling for Help
You do not need to pull apart the ceiling to gather useful information. First, take photos of the water stain, drip location, and exterior vent or roof area. Note whether it occurred during rain, after using plumbing, or while the AC or another appliance was operating.
Inside the RV, gently feel around the vent trim and nearby ceiling for dampness or softness. Check cabinets, corners, and wall panels below the suspected area. If you can safely access the roof, inspect the vent lid and visible sealant for obvious damage. Avoid stepping on wet roofing, weak areas, or surfaces you are not confident will support your weight.
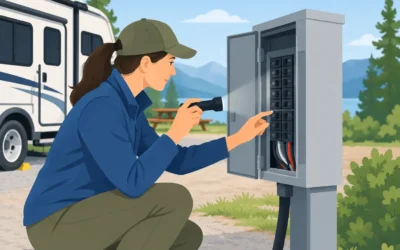
Then protect the interior. Place a container under active drips, dry wet surfaces, and move bedding, electronics, and personal items away from the area. If water is near a light fixture, outlet, breaker panel, or appliance wiring, turn off the affected circuit when you can do so safely. Do not use a leaking vent fan or air conditioner until the source is known.
What you should avoid is puncturing a bulging ceiling panel, spraying water blindly across the roof, or covering an appliance exhaust with tape or plastic. Those shortcuts can spread damage, hide the source, or create a safety problem.
When an RV Vent Leak Needs Professional Repair
A small crack in a vent lid may be a straightforward replacement. But a persistent drip, soft ceiling, stained wall, or leak near electrical equipment deserves a more thorough diagnosis. The same is true when the leak returns after someone has already applied sealant.
A mobile RV technician can inspect the vent assembly, roof membrane, seams, adjacent penetrations, interior moisture path, and related systems at your campsite, ranch property, or roadside location. That saves you from towing a compromised RV to a shop while water damage continues to spread.
Mobile RV Solutions serves RV owners across the Texas Hill Country with practical on-site diagnostics and repair. Whether you are parked near Fredericksburg, Kerrville, Bandera, Comfort, or on remote acreage, the goal is to find the actual entry point, explain the repair clearly, and get your RV dry and dependable again.
A vent leak is rarely convenient, but catching it early can keep a replaceable cover or failed seal from becoming a roof rebuild. If the ceiling is wet, the stain is growing, or you are unsure whether water is near wiring or an LP appliance, treat it as an active repair need and get it checked before the next storm or the next leg of your trip.
0 Comments