
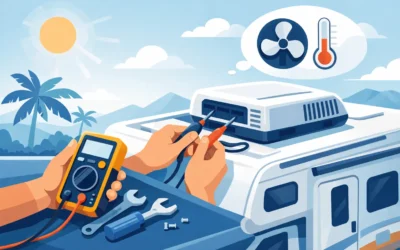
A Texas Hill Country afternoon can turn an RV from comfortable to unbearable quickly. When the rooftop unit quits at a campground, on a ranch, or beside the river, this RV air conditioner repair guide can help you separate a simple power or airflow issue from a problem that needs a trained technician.
Most RV air conditioner failures do not begin with a dramatic breakdown. Cooling may get weaker, the unit may cycle too often, or the fan may run without delivering cold air. Catching those signs early can protect the compressor, prevent unnecessary part replacement, and get your living space comfortable again sooner.
Start With Safe, Simple Checks
Before opening an air conditioner shroud or touching wiring, turn the thermostat to OFF and disconnect shore power or switch off the generator. RV air conditioners use high voltage, and rooftop work adds the risk of a fall. If you are parked on uneven ground, in high wind, or without a safe ladder, leave rooftop inspection to a mobile RV technician.
Start inside the coach. Confirm that the thermostat is set to COOL, the selected temperature is below the current cabin temperature, and the fan setting is correct. A thermostat accidentally set to FAN can make it sound as if the system is working while it delivers only room-temperature air.
Then check whether the RV has adequate power. Low campground voltage, a weak generator, a tripped breaker, or a problem at the shore-power pedestal can keep an air conditioner from starting properly. If lights dim hard when the unit tries to start, you hear repeated clicking, or the compressor hums and shuts down, turn the system off rather than repeatedly trying to restart it. Repeated low-voltage starts can damage electrical components and the compressor.
A dirty return-air filter is another common, inexpensive cause of poor cooling. Remove the interior ceiling grille and inspect the filter. Wash reusable filters with mild soap and water, let them dry fully, and reinstall them. If the filter is torn or badly clogged, replace it. Never operate the unit with the filter removed for days at a time, because dust can build up on the evaporator coil.
What the Symptoms Usually Mean
The symptom matters more than the age of the RV. A 10-year-old unit with a wiring fault may be repairable, while a newer unit with a failed sealed compressor may make replacement the better value.
The fan runs, but the air is not cold
First, give the unit several minutes after startup. In hot weather, the air coming from the ceiling vents should feel noticeably cooler than the air returning through the intake grille. If it stays warm, possible causes include a failed capacitor, control-board issue, compressor problem, low voltage, or a thermostat communication fault.
Avoid assuming it simply needs refrigerant. Most rooftop RV air conditioners are sealed systems. Unlike an automotive A/C system, they are not designed for routine refrigerant topping-off. If refrigerant is low, there is usually a leak, and the unit may require specialized repair or replacement.
The unit freezes up or airflow is weak
Ice on the evaporator coil can block airflow and leave the RV feeling warmer even though the air conditioner is running. Turn the cooling mode off and run the fan to help the coil thaw. Do not chip at ice with a screwdriver or knife, which can puncture the coil.
Freeze-ups often come from restricted airflow caused by a dirty filter, dirty coil, blocked vents, or a failing blower motor. They can also occur when the unit runs for long periods in humid conditions. Once thawed, clean the filter, make sure every supply vent is open, and check that return-air openings are not blocked by bedding, storage bins, or decorative covers.
The breaker trips or the unit will not start
A breaker that trips once may have been dealing with a temporary load. A breaker that trips repeatedly needs attention. The cause could be a weak breaker, damaged wiring, a failing capacitor, an overloaded campground circuit, or a compressor that is drawing excessive amperage.
Do not install a larger breaker or bypass a safety device to keep the A/C running. RV electrical systems are interconnected, and an improper workaround can overheat wiring or damage the converter, generator, or shore-power connection.
Water drips from the ceiling assembly
A rooftop air conditioner normally drains condensation onto the roof, where it runs off. Water inside the RV often points to a blocked drain path, a cracked drain pan, or a failed roof gasket beneath the unit. It can also be condensation from very humid air meeting a cold interior surface.
If water is dripping from the ceiling, shut the unit down and protect nearby electrical fixtures and furnishings. Continued leakage can damage insulation, ceiling panels, and wall framing. A technician can inspect the gasket compression and roof condition without guessing from inside the coach.
The unit is loud, rattling, or cycling strangely
New rattling can be as simple as a loose shroud, debris near the fan, or a loose interior grille. Grinding, screeching, electrical buzzing, or a burnt odor are different. Turn the air conditioner off and arrange service. Those symptoms can indicate a failing motor, electrical connection, capacitor, or compressor.
Short cycling – when the unit starts and stops every few minutes – can be caused by thermostat placement, voltage trouble, dirty coils, or a failing control component. It may still cool between cycles, but running it that way can turn a manageable repair into a more expensive one.
Practical RV A/C Maintenance That Pays Off
Rooftop air conditioners work hard in the Hill Country, especially when an RV sits in direct sun with doors opening, people moving in and out, and a warm roof radiating heat downward. A little maintenance before summer helps reduce surprise failures.
Check the return-air filter monthly during heavy use. At least once a season, inspect the exterior shroud from a safe position for cracks, loose fasteners, wasp nests, leaves, and other debris. Keep branches clear of the roof and confirm that the shroud is secure before travel.
It also helps to inspect the roof seal around the A/C unit during regular roof maintenance. The mounting gasket compresses over time. If it is too loose, rain and condensation can find their way inside. If it is overtightened, the gasket can be damaged. This adjustment is not a place to guess with a wrench.
Power quality deserves attention as well. At a campground, use a properly rated surge protector or electrical management system and inspect the pedestal before connecting. If the voltage is unstable, report it to campground staff and avoid running high-demand appliances together. An air conditioner, microwave, electric water heater, and battery charger can put real strain on a marginal hookup.
When DIY Stops and Professional Repair Begins
Cleaning a filter, resetting a breaker once, and confirming thermostat settings are reasonable owner checks. Electrical diagnosis, capacitor replacement, control-board testing, refrigerant work, roof-gasket adjustment, and compressor evaluation are better handled by someone with the proper meter, tools, parts, and safety training.
Call for service promptly if you smell burning insulation, see melted plastic, have repeated breaker trips, find water entering the RV, or lose cooling during extreme heat. This is especially true for full-time RV residents, travelers with pets, and anyone parked far from town. Comfort is part of the issue, but so are equipment protection and safety.
Mobile RV Solutions provides on-site diagnostics and repair for RV owners throughout Fredericksburg, Kerrville, Bandera, Comfort, Ingram, Center Point, and nearby Hill Country communities. A mobile visit can save the trouble of packing up, disconnecting utilities, and moving an RV that is otherwise safe and stationary.
If your unit still runs but is struggling, do not wait for the hottest day of the trip to see whether it recovers. A quick, accurate diagnosis while you are already parked can keep a small air-conditioning problem from becoming the reason your plans have to change.
0 Comments