
Your coffee maker quits midway through breakfast, outlets go dead while you are boondocking, or the TV will not run even though the batteries appear charged. Those are frustrating moments, especially when your RV is parked at a Hill Country campground, beside the river, or on remote acreage. An RV inverter replacement may be the answer, but replacing the inverter before diagnosing the entire power system can waste money and leave the real problem behind.
An inverter is part of a connected electrical system. Batteries, cables, fuses, charging equipment, shore power, generators, transfer switches, and individual appliances all affect how it performs. A practical diagnosis identifies whether the inverter itself has failed, whether it has lost its DC power supply, or whether another component is causing the trouble.
What an RV Inverter Does
An RV inverter changes 12-volt DC battery power into 120-volt AC power for selected household-style outlets and appliances. It allows you to run certain AC items when you are not connected to shore power and your generator is off. Depending on the RV and inverter size, that may include outlets for chargers, a television, a microwave, or other designated circuits.
It does not create power from nothing. The inverter draws heavily from the battery bank, so healthy batteries and properly sized wiring matter just as much as the inverter itself. A weak battery can make a good inverter shut down under load.
Do not confuse an inverter with a converter. A converter uses shore or generator power to supply 12-volt DC power and charge batteries. Many newer RVs use an inverter/charger, which can perform both jobs. The distinction matters because a battery that will not charge, or lights that will not work on shore power, may point to the converter or charger side of the system rather than an inverter failure.
Signs You May Need RV Inverter Replacement
A completely dead inverter is easy to notice. More often, however, trouble starts with intermittent shutdowns, warning lights, alarms, or outlets that work only sometimes. If the unit shuts off when you plug in a modest appliance, displays a fault code, makes unusual buzzing or clicking sounds, or has a burnt-electrical smell, it deserves prompt attention.
Another common complaint is that the inverter appears to be on, but no AC power reaches the outlets it serves. That can be an internal inverter issue, but it can also be a tripped GFCI outlet, a failed breaker, a blown fuse, loose wiring, a transfer-switch problem, or a battery voltage drop. In a motorhome or travel trailer with a complicated power setup, guessing can turn a manageable repair into a larger electrical problem.
Heat is another warning sign in the Texas Hill Country. Inverters naturally generate heat when carrying a load, but a unit that is too hot to approach, repeatedly trips on temperature, or runs its cooling fan constantly may have poor ventilation, excessive demand, damaged wiring, or internal failure. Do not cover the inverter compartment or keep resetting a unit that is overheating.
Check the System Before Replacing the Inverter
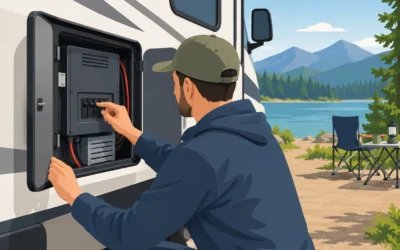
Before approving an RV inverter replacement, a technician should verify the basics. The battery bank needs to be tested under load, not simply read at rest with a meter. Battery terminals and grounds should be clean, tight, and free of corrosion. Main inverter fuses, breakers, disconnects, and cables need inspection for heat damage or poor connections.
The technician should also confirm which outlets and appliances are actually fed by the inverter. In many RVs, the inverter does not power every 120-volt circuit. Your air conditioner, electric water heater element, fireplace, or large residential refrigerator may require shore power or a generator even when the inverter is operating normally. Trying to run a high-demand appliance from an undersized battery bank can trigger low-voltage or overload protection.
This diagnostic step is particularly useful when the RV has recently sat unused. Batteries can sulfate, connections can corrode, and rodents can damage wiring. If the inverter is healthy but the battery bank is failing, installing a new inverter will not restore dependable off-grid power.
Choosing the Right Replacement Inverter
The right replacement is not always the biggest inverter available. Capacity should match the appliances you need to run, the battery bank’s available power, the existing cable size, and the RV’s electrical layout. A larger inverter can support more load, but it also can drain batteries faster and may require heavier cables, larger fuses, and battery upgrades.
Pure sine wave inverters produce cleaner power and are generally the better choice for sensitive electronics, modern chargers, CPAP machines, and many newer appliances. Modified sine wave models may cost less, but some equipment can run hotter, make noise, or fail to operate properly on them. The best choice depends on how you use the RV and what equipment you expect to power away from hookups.
If your existing system is an inverter/charger, replacement requires an added layer of planning. The new unit must work with the battery chemistry, especially if you have upgraded to lithium batteries. Charging profiles, battery monitoring, solar charging, generator operation, and automatic transfer functions may all need to be configured correctly. This is not a good place to rely on a nearly identical-looking unit without checking specifications.
What a Professional Replacement Involves
Inverter work starts with safely isolating all power sources. That can include unplugging shore power, shutting down the generator, disconnecting solar charging when applicable, and disconnecting battery power in the proper order. Inverters can handle high DC current, and an accidental short at the battery bank can cause serious damage or injury.
After removing the failed unit, the installation should include an inspection of the cables, connectors, fuse protection, grounding, mounting location, and ventilation. A technician should not simply move damaged or overheated wiring onto a new inverter. The replacement must be secured, wired to manufacturer requirements, and protected by properly sized fuses and breakers.
Testing comes next. The system should be checked on battery power and, where applicable, shore power and generator power. The technician verifies output voltage, charging operation, transfer behavior, load performance, and any control-panel or battery-monitor communication. That final testing is what confirms the repair will hold up after the service truck leaves.
For RV owners in Fredericksburg, Kerrville, Bandera, Comfort, Ingram, Center Point, and surrounding communities, mobile service can avoid the hassle of breaking camp or towing an RV solely for electrical work. Mobile RV Solutions can diagnose the inverter system where the RV is parked and explain whether replacement, wiring repair, battery service, or another correction is the sensible next step.
Protecting Your New Inverter
A new inverter will last longer when the battery bank is maintained and the installation area stays dry and ventilated. Check battery connections regularly, keep battery compartments clean, and address water leaks before they reach electrical equipment. If your RV spends long periods in storage, use an appropriate maintenance plan for its battery type rather than allowing batteries to remain deeply discharged.
Use the inverter with realistic expectations. Small electronics and occasional appliance use are very different from running multiple high-wattage devices for hours. Watch the battery monitor, avoid stacking heavy loads, and start the generator or connect to shore power when the battery bank needs support.
When power problems interrupt a trip, the goal is not just to get one outlet working. It is to restore safe, dependable power so your RV can stay comfortable at the campsite and ready for the next stretch of road.
0 Comments