
A Texas Hill Country thunderstorm can turn a pinhole in an RV roof seal into a wet ceiling, damaged insulation, and a much larger repair by morning. The hard part is that water often enters in one place and shows up somewhere else. Timely RV roof repair is less about putting more sealant on every surface and more about finding the actual failure, protecting the roof material, and stopping moisture before it reaches the structure below.
For RV owners parked at a campground, on a ranch, or along the road, that distinction matters. A roof problem can affect far more than the roof. Water can reach ceiling panels, cabinets, wiring, insulation, and walls, turning a manageable exterior repair into an interruption to travel or full-time living.
Start With the Signs of a Roof Leak
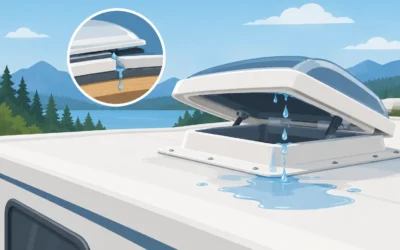
A visible drip is an obvious warning, but it is not the only one. A soft ceiling spot, brown stain, bubbling vinyl, musty smell, loose interior trim, or unexplained moisture around an upper cabinet can point to a roof leak. In some cases, an air conditioner gasket, vent flange, skylight, antenna mount, or front cap seam is the source rather than the flat roof field itself.
Look at the RV after a heavy rain, but do not limit the inspection to where water appears indoors. Gravity, roof framing, and insulation can carry water several feet from the entry point. If staining is near a roof vent, inspect that vent and the seams uphill from it. If the leak appears at a wall or in a front cabinet, examine the roof-to-cap seam and marker lights as well.
Do not walk on the roof until you know it can support you safely. A roof that feels spongy, flexes more than normal, or has signs of water damage may need inspection from a ladder or by a technician. Stepping onto weakened decking can cause injury and additional damage.
Identify Your RV Roof Material Before Repairing It
The right repair method depends on the roof material. Many travel trailers and motorhomes use EPDM rubber, TPO membrane, fiberglass, or aluminum. These materials can look similar from the ground, but they do not all respond well to the same cleaners, tapes, coatings, or sealants.
EPDM is a flexible rubber membrane, often black underneath and white on top. It is common, durable, and repairable, but petroleum-based products and incompatible chemicals can damage it. TPO is also a white flexible membrane, though it is typically smoother and may have different manufacturer-approved repair products. Fiberglass roofs are rigid and can crack around stress points or penetrations. Aluminum roofs often develop leaks at seams, fasteners, and roof-mounted components.
If you are unsure what roof you have, avoid guessing with a tube of general-purpose silicone. Silicone is not the best choice for many RV roof applications, and it can make later repairs harder because other products may not adhere well to the residue. A compatible self-leveling lap sealant or membrane-specific patch is usually the better route, but compatibility should be confirmed first.
Common failure points to inspect
Most roof leaks begin at an opening, edge, or seam. Check around roof vents, refrigerator vents, air conditioners, skylights, plumbing vents, solar mounts, antennas, and satellite equipment. Inspect the front and rear cap seams, side termination rails, ladder mounts, and any place a screw or bracket penetrates the roof.
Pay attention to sealant that is cracked, curled, separated, missing, or chalky. A sealant bead does not have to look perfect to work, but gaps and lifting edges are invitations for water. Branch scrapes and punctures also deserve immediate attention, especially after parking beneath low oak or cedar limbs.
A Practical RV Roof Repair Approach for Small Damage
A small, accessible issue can sometimes be handled before it becomes a service call. The goal is not to coat the entire roof with sealant. It is to make a clean, durable repair using products designed for that roof.
First, choose a dry day and give the roof time to dry completely. Dirt, moisture, and old loose sealant can prevent a new patch or sealant from bonding. Clean the repair area with a roof-safe cleaner, then remove only sealant that is loose, cracked beyond use, or no longer attached. Avoid aggressively scraping sound membrane material.
For a minor seam gap or a small crack in existing lap sealant, apply compatible self-leveling sealant according to the product directions. For a puncture in a membrane roof, a properly sized membrane patch or RV roof repair tape may be appropriate. The patch needs clean, dry material around it and enough overlap to create a dependable seal. Press it down firmly and inspect the edges.
After the repair cures, check it after the next rain or a careful low-pressure water test. Do not use a pressure washer on the roof. High-pressure water can force moisture under seams and seals that would otherwise remain watertight.
When a Patch Is Not Enough
There is a point where adding another layer of sealant only hides the real issue. If you see soft roof decking, sagging, widespread membrane separation, a large tear, recurring leaks, or water damage inside the RV, a more thorough inspection is the smart move. The same applies if a roof-mounted air conditioner or vent has shifted, because the problem may involve mounting hardware, a gasket, or the underlying roof structure.
Interior moisture is especially worth taking seriously. Wet insulation can hold water long after the roof looks dry. Wood framing and decking can deteriorate quietly, and electrical wiring near a leak creates a safety concern. A quick exterior patch may still be useful as temporary protection, but it should not replace diagnosis when there are signs that water has traveled below the roof surface.
Full roof replacement is not always necessary. Many roofs can be repaired by addressing damaged sections, replacing failed seals, rebuilding localized decking, or resealing penetrations. It depends on the age of the roof, the extent of water intrusion, the condition of the membrane, and whether prior repairs were done correctly.
Why Roof Leaks Can Affect Other RV Systems
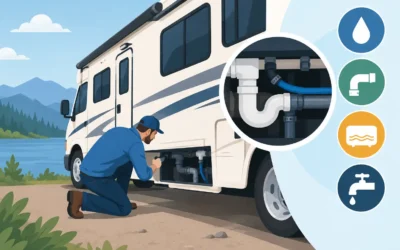
An RV is compact by design, which means its systems live close together. Water entering near a roof vent can run toward ceiling wiring, light fixtures, cabinets, or air conditioning components. A leak around a refrigerator vent can affect cabinetry and wall insulation. Moisture near an exterior electrical connection or solar wiring needs prompt attention.
That is why a roof inspection should include more than the surface. A good diagnosis follows the likely water path, checks the affected interior area, and looks for damage that will continue even after the rain stops. For full-time RV residents, this can be the difference between keeping the coach comfortable and facing a growing mold or structural problem.
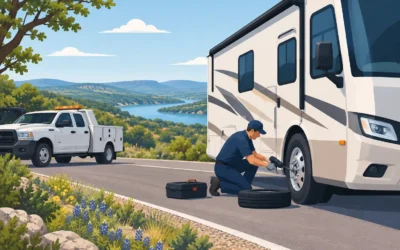
Mobile RV Solutions can inspect roof damage where the RV is parked, whether that is a campground near Fredericksburg, a private property outside Kerrville, or a remote Hill Country acreage. On-site service can save the trouble of moving an RV when roof damage, weather, or water intrusion makes travel a poor choice.
Prevent Roof Trouble With a Simple Routine
Roof maintenance is usually less expensive and less stressful than leak repair. Inspect the roof at least twice a year, and again after hail, high winds, low branches, or a long period of storage. Spring and fall are practical times to check the roof before seasonal weather changes.
Keep the roof clear of leaves, twigs, and standing debris, especially around vents and air conditioners. Debris holds moisture and can conceal cracked sealant. Wash the roof with a material-safe cleaner so developing problems are easier to see. While you are there, inspect the gutter rails and roof edges, since water can track behind a loose rail seal.
If you cover your RV, use a cover made for RV use and make sure it is properly secured. A loose or abrasive cover can rub through roof material over time. Parking under shade can reduce sun exposure, but branches can create another risk. As with most RV maintenance, the best choice depends on where and how the coach is stored.
Get Help Before Water Spreads
If the roof is actively leaking, move valuables away from the wet area, place a container under drips if needed, and reduce interior humidity with ventilation or a dehumidifier when power is available. Avoid running electrical equipment near wet ceiling areas. Temporary measures can protect your belongings, but the source still needs to be located and corrected.
A small roof issue is easiest to handle when it is still small. If you notice new staining, failed sealant, a puncture, or a soft spot, address it before the next Hill Country rain has a chance to turn a simple repair into a longer stay off the road.
0 Comments